Chicken Wire in Floristry: A Reusable Grid That Holds Stems Where You Place Them
 Save
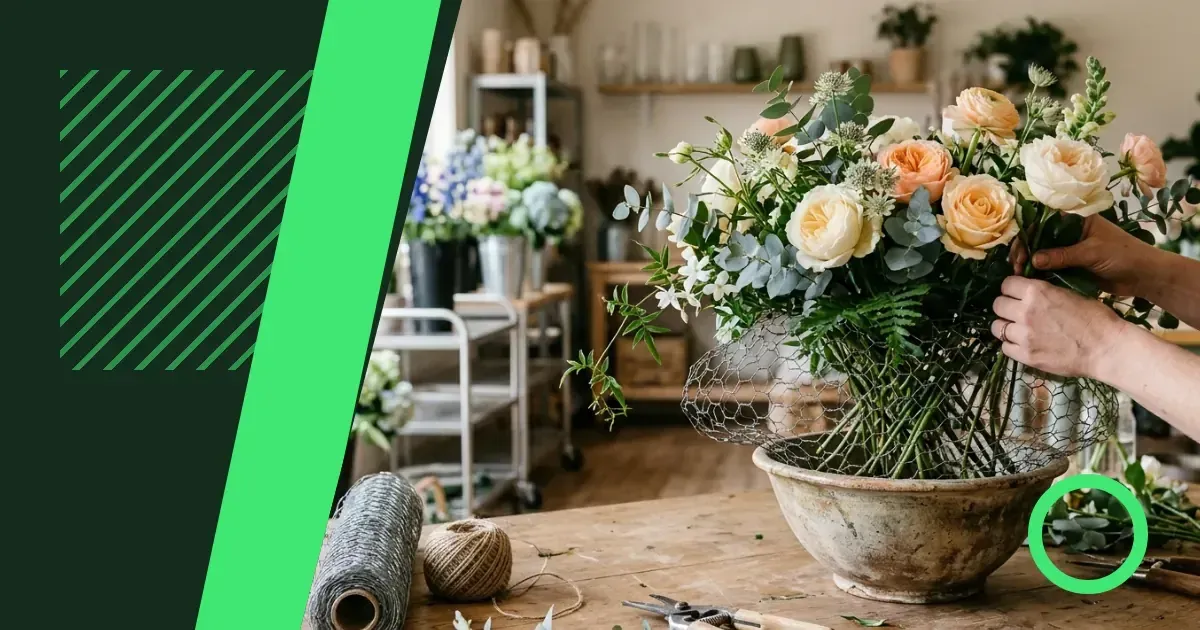
Chicken wire in floristry is a wire mesh formed into a loose ball or dome that sits inside a vase or bowl, creating a grid through which stems pass and hold their angle. It gives you control without the rigidity of foam, and you can reuse it. Harvest Moon Floral Art walks you through what it is, when it works best and how to prepare and use it so your arrangements stay exactly as you built them.
What chicken wire is and how it differs from other supports
Chicken wire – also called wire netting or floral netting – is a hexagonal mesh sold by the roll, cut to size and scrunched into a shape that fills your container. Each stem threads through the gaps, and the wire holds it at the angle you set. Unlike floral foam, which grips stems in a fixed position, chicken wire lets you adjust a stem after placement without leaving a permanent hole.
The mesh comes in different gauges. A lighter gauge bends easily and suits delicate stems; a heavier gauge holds woody branches without collapsing. Most florists keep a roll of medium-weight mesh for general use and a finer grade for smaller arrangements.
Arrangements that benefit from a wire grid
Chicken wire works best in arrangements where stems cross at natural angles or where you want a loose, garden-picked feel. It suits hand-tied bouquets placed into water, centrepieces in low bowls and any design where you are working with a mix of stem thicknesses.
It is the first choice for:
- Large vases where foam would need several blocks and create wastage
- Arrangements that will be topped up with water over several days
- Designs using branches, grasses or foliage that foam struggles to grip
- Events where you need to transport the mechanics and reuse them
Preparing chicken wire before it goes into the container
Measure a piece roughly three times the diameter of your vase opening. Fold the cut edges inward so no sharp points stick out – they will scratch your hands and snag stems. Scrunch the mesh into a loose ball, leaving gaps large enough for your thickest stems to pass through without force.
The ball should sit just below the rim of the container, dome-side up. If it is too tight, stems will bend when you push them in; too loose and they will not hold their angle. Test the density by threading a spare stem through – it should slide in with light resistance and stay where you place it.
Securing the wire so it does not shift during arranging
Even a well-fitted ball of chicken wire can lift or twist as you add stems. Anchor it with waterproof floral tape in a cross shape over the vase opening, pressing the tape down onto dry glass or ceramic on all sides. For a bowl without a neck, tuck two or three lengths of stub wire through the mesh and hook them under the rim.
In a tall vase, push the ball down so it sits at water level rather than at the rim. This keeps the grid where the stems naturally splay and leaves the top of the vase clear for adjustments.
Adding water and keeping the mechanics clean
Fill the container with water before you start arranging – adding it afterwards disturbs the stems and can tip a shallow bowl. The water level should cover the base of the wire ball but does not need to reach the top. Stems draw water through their cut ends, and those ends will be deep in the grid.
After the arrangement is dismantled, rinse the chicken wire under a tap to remove leaf matter and bacteria. Scrub it with a washing-up brush if stems have left residue, then leave it to dry completely before storing. A roll of used wire lasts for years if you clean it between uses.
Step-by-step: fitting and using chicken wire in a round vase
- Cut a piece of mesh three times the width of the vase opening and fold the sharp edges inward.
- Scrunch the mesh into a dome shape, leaving gaps between the layers, and lower it into the vase so the top sits just below the rim.
- Cross two strips of waterproof tape over the opening, pressing them onto the dry outside of the vase to anchor the wire.
- Fill the vase with water until it covers the base of the wire ball.
- Thread each stem through the mesh at the angle you want, pushing it down until the cut end reaches the water.
- Adjust any stem by lifting it slightly and repositioning – the wire will hold the new angle without damage.
Common mistakes and how to avoid them
Packing the wire too tightly is the mistake most arrangers make when they first use chicken wire. A dense ball blocks thick stems and forces you to pull the whole thing out and start again. Leave air pockets and test the density before you fill the vase with water.
Skipping the tape or wire anchors leads to a grid that lifts as you work, pulling stems out of position. Even a small shift changes every angle in the arrangement. Secure the mechanics first, then build with confidence.
When foam still makes more sense
Chicken wire is not the answer for every arrangement. Foam gives you more control in shallow dishes where stems need to sit horizontally, and it is faster for symmetrical designs with a fixed structure. If you are creating a buttonhole or corsage, wire and tape are the mechanics – chicken wire does not come into it.
| Support | Best for | Reusable | Adjustment after placement |
|---|---|---|---|
| Chicken wire | Natural, loose designs in vases and bowls | Yes | Easy – lift and reposition |
| Floral foam | Structured, symmetrical arrangements | No | Difficult – new hole each time |
| Pin frog | Ikebana and minimal stem counts | Yes | Moderate – depends on stem weight |
Storing and reusing your chicken wire
Once the wire is clean and dry, leave it in a loose ball rather than flattening it. Repeated flattening weakens the structure and creates creases that will not hold stems reliably. Store it in a basket or a drawer where it will not snag other tools.
A single piece of chicken wire lasts through dozens of arrangements if you rinse it after each use and keep the edges folded inward. When the mesh starts to lose its spring or develops rust spots, replace it – the cost is low and a fresh piece gives you better control.
Choosing between different mesh sizes
Mesh is sold by the size of the hexagonal gaps, measured across the widest point. A larger gap – around two to three centimetres – suits mixed arrangements with thick and thin stems. A smaller gap gives more support for fine stems but can feel crowded when you are working with foliage or branches.
Buy a roll of medium-gauge mesh and cut pieces to suit each container. One roll will cover most of the work you do at home, and you can always double a layer if you need more density in a wide, shallow bowl.
Download PDF: Chicken Wire Prep and Fitting Checklist PDF, 29 KB
Frequently asked questions
What is chicken wire used for in flower arranging?
Chicken wire is scrunched into a ball and placed inside a vase or bowl to create a grid that holds flower stems at the angles you set. It gives support without the rigidity of foam and can be reused after rinsing.
How do you secure chicken wire in a vase?
Cross two strips of waterproof floral tape over the vase opening, pressing them onto the dry outside to anchor the wire. For bowls without a neck, tuck stub wire through the mesh and hook it under the rim.
Can you reuse chicken wire after an arrangement?
Yes. Rinse the wire under a tap to remove plant matter and bacteria, scrub it with a brush if needed, then dry it completely before storing. A single piece lasts through many arrangements if cleaned after each use.